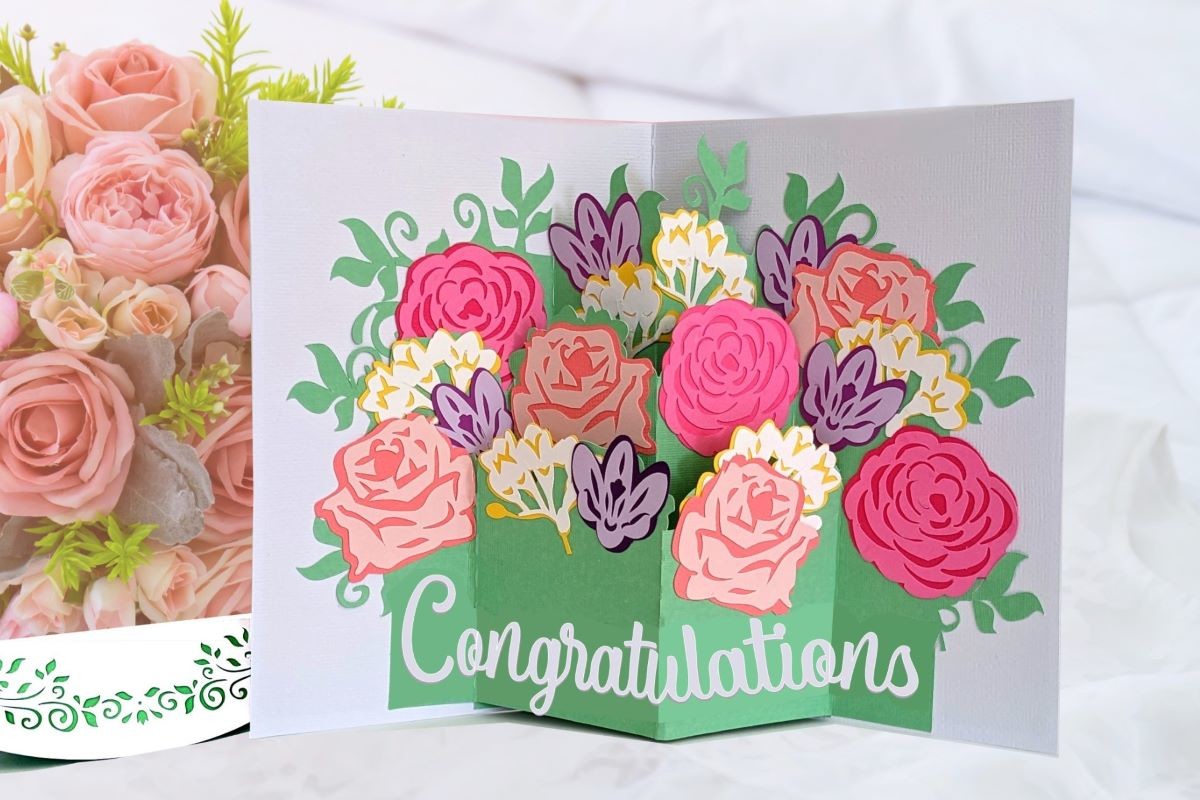
A flower pop up card is the one handmade card people keep. You open it, a bloom rises off the page, and the whole thing still folds shut flat enough to post. Two mechanisms do all of that: a folded paper flower on the crease, or a box card that squares up as it opens.
Mine did not work the first time. The flower I folded was beautiful and far too big: the card would not shut, and when I forced it the petals creased. My second one sprang open halfway, because I had glued it too close to the crease.
Neither of those is a skill problem. Both are numbers, and you can settle both with a pencil before you cut anything. I have put both below, next to the two mechanisms and the ready nets. The Flower Bouquet 3D Pop Up Card is the shortcut if folding is not your evening.
Quick answer: a flower pop up card is a folded paper flower glued across the inside crease of a folded card, so the flower collapses as the card closes and opens as the card opens.
- Two mechanisms: the folded-square flower, which needs only scissors, and the box card bouquet, which needs a template.
- The size that closes: on an A5 card base, keep each paper square at 10 cm. A 15 cm square makes a flower about 18.6 cm across, wider than the card.
- Paper: 80 to 120 gsm for the flowers, 200 to 250 gsm cardstock for the base.
- Glue line: 13 mm (half an inch) in from the inner crease, on both sides.
- Envelope: a folded A5 card is 148 x 105 mm and drops into a C6 envelope with 7 mm to spare.
What makes a flower pop up card hold its shape
Every flower pop up card is one piece of paper pretending to be two things at once. Flat when the card is shut. Three-dimensional when it is open.
The hinge that lets it be both is the card’s own crease. Nothing else holds the flower up.
The folded-square mechanism works like this. You fold a paper square into eight wedges, cut one curved petal, and open it into a rosette. Cut one petal away, glue the gap closed, and that flat rosette becomes a shallow cone.
Then you flatten the cone along one line and glue each flattened half to one side of the crease. Now the card drives the flower. Shut it and the cone collapses along your glue line; open it and the flower stands back up.
That is the whole trick, and it is why two things matter more than neatness. Your flower has to be narrow enough to fit inside the closed card. Your glue line has to sit far enough from the crease that the petals have somewhere to go.
The second mechanism is a box card. Instead of folding a flower you build a shallow box whose walls are hinged at the crease, and you stand a cut bouquet inside it.
Closed, the box lies flat as a diamond. Opened, the walls square up and the bouquet rises with them. It looks harder than it is, but it does need an accurate net.
Most tutorials show you one of the two and never mention the other. Learn both and you can make a flower card for any occasion without looking anything up again.
If you want the box mechanism without drawing the net, the Orchid Box Card SVG has the tabs cut at the angle that folds flat.
What you need, and what paper weight each part wants
The commonest mistake here is using one paper for everything. Your flower and your base want opposite things from a sheet, and one weight cannot do both jobs.
- Flower paper, 80 to 120 gsm. Ordinary printer paper sits at the bottom of that range and works. Anything heavier will not collapse cleanly along the glue line, and your card springs open on the shelf.
- Card base, 200 to 250 gsm cardstock. Thinner and the whole card bows the moment a flower goes inside it. Thicker and the crease cracks.
- Scissors with a fine point. You are cutting curves through eight layers of folded paper, so the tips matter more than the blades.
- A ruler and a pencil. Every number on this page gets marked before anything gets cut.
- A bone folder, or the back of a spoon. Score your base crease before folding and it will not split.
- Glue stick or a tape runner for paper on paper. Wet glue will cockle an 80 gsm petal in front of your eyes.
- Fine-tip markers for the petal lines.
That is the whole list, and no machine is needed for the first mechanism. Worth saying, because searches asking for a pop-up card template are the only group here still climbing while the ones asking for an easier version fall away.
People are not after a simpler craft. They are after an accurate one. For a printable middle path, the Pop-up Sunflower Greeting Card Template ships a PDF next to the cut file.
Idea 1: the folded-square flower pop up card, step by step
This is the flower pop up card you can make tonight with a piece of printer paper. People call it a diy flower pop up card, a paper flower pop up card, a floral pop up card or a 3d flower pop up card. One square, eight folds, one cut.
- Cut your squares. Seven squares at 10 x 10 cm for an A5 base. Three or four colours turn seven blooms into a bouquet; one colour reads as a single flower.
- Fold the square in half diagonally to make a triangle, then in half again, then in half once more. You now hold a narrow wedge, and every fold passes through the centre.
- Draw one petal on the wedge: a curve that starts on one folded edge and finishes on the other, at the open end. Cut along it.
- Open it out. You have an eight-petal rosette. Cut one petal off completely.
- Glue the gap closed. Put glue on the petal beside the gap and lay the petal from the other side on top. The flat rosette lifts into a shallow cone. This is the step that makes it three-dimensional.
- Add the petal lines with a fine-tip marker: an outline around each petal, then eight to twelve short lines radiating from its centre. This is what makes a paper flower read as a flower in a photograph.
- Repeat until you have seven cones. Four minutes each once you have the rhythm.
- Flatten each cone along a single line, so it folds like a fan instead of crumpling.
- Glue them in as described below. Three along the crease, two either side, two at the outer edges.
About forty minutes for a seven-flower card the first time, twenty-five after that. Most of it is the markers.
Two temptations, both mistakes: glitter card for the flowers, whose coating stops the cone collapsing, and bigger squares for a bolder bloom.
Want the petals already drawn? The Pop-up Sunflower Greeting Card Template prints the shapes at a stated size, so your evening goes on assembly.
The square size that actually closes: the number nobody gives you

Here is the arithmetic no flower pop up card tutorial writes down. It is the difference between a card that shuts and a card you have to sit a book on.
Fold a square through its centre and cut a petal at the open end, and the rosette you open out has a radius of about 0.707 of the square’s side. That radius is half the square’s diagonal.
Then you remove one petal of eight and glue the gap, which pulls the circle in. The cone’s base ends up about 1.24 times the side of your original square.
Run a 15 cm square through that and you get a flower about 18.6 cm across. An A5 card folded in half is 148 x 105 mm. An 18.6 cm flower does not fit, and no amount of pressing will make it.
Multiply the side of your paper square by 1.24. If the answer is wider than your closed card minus 10 mm, the card will not shut. On an A5 base that caps the square at 11 cm, and I keep mine at 10 cm.
The multiplier holds only while you remove exactly one petal of the eight. Cut a different number of petals and the sum changes with them.
The same sum works backwards. Want a flower exactly 9 cm across for a small card? Divide by 1.24 and cut 7.2 cm squares.
This is also why the published measurements you find so often fail in your hands. They were written around one photograph, not around the fold.
Once you have the multiplier you never need anyone else’s numbers again. A file that states its finished size skips the sum altogether, which is what the Pop Up Orchids card does.
Where to glue the flower so the card lies flat
Size solved, this is the other half. A flower that fits can still make a card that refuses to stay shut, and the cause is always the glue line.
Each flattened cone has two halves. One goes on your left page, one on the right, and the fold between them has to line up with the crease.
Glue sitting on the crease gives the petals nowhere to fold into, and the card bulges. Halves glued at different distances make the flower twist as it closes, and that is what creases petals diagonally.
So measure it. I mark a pencil line 13 mm, about half an inch, out from the crease on each page. Keep your glue inside that line, never across it, and keep every flower at the same distance.
Work from the middle out. The flower on the crease goes on first, then one either side, then the outer pair. Close the card gently after each one: if something catches, you want to know which flower did it.
Two more details. Keep all seven flowers at least 5 mm inside the outer edges, or the petals get bruised in the envelope. Glue the flowers to the card, not to each other.
If a petal still sticks out when the card is closed, trim that petal: re-gluing tears the base. A net with the glue line already printed, like the Orchid Box Card SVG, takes this step out of the job.
Idea 2: the box card flower bouquet that opens into a scene
The second mechanism is the one tutorials almost never show, and it is the one that makes people ask where you bought the card.
A box card has four short walls hinged at the base and joined at the corners with a flexible tab. Flat, it folds to a diamond and slips in an envelope.
Opened, the walls square up into a shallow box, and whatever you mounted inside stands up with them: a bouquet, a flowerpot, a vase of tulips.
Why a flower bouquet pop up card is worth the extra work: the box gives you depth. The folded-square flower is one plane of petals.
A box card has a front layer, a middle layer and a back layer, so your bouquet reads as a bouquet, not as flowers printed on a card.
Why it needs a template: the walls only fold flat if the corner tabs sit at the right angle, and that angle depends on the wall height. My first hand-marked box jammed half-open.
The net is the whole project, and the flowers are decoration. Three files cover the useful variations, and all three fold flat for posting.
Unlimited creative assets. Access to AI tools.
Commercial licence included.
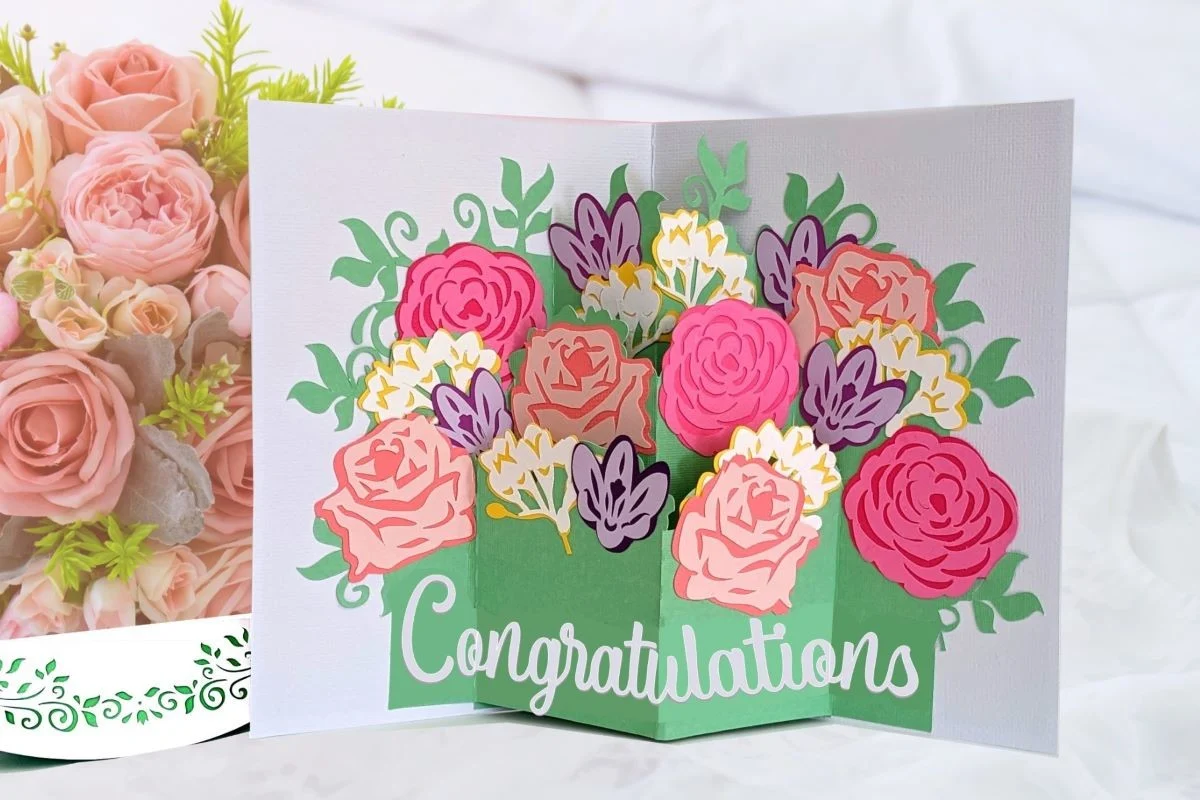
Flower Bouquet 3D Pop Up Card
A full bouquet on a box base, with the corner tabs already drawn. Start here: the bouquet is layered, so it has depth without extra pieces.

Orchid Box Card SVG
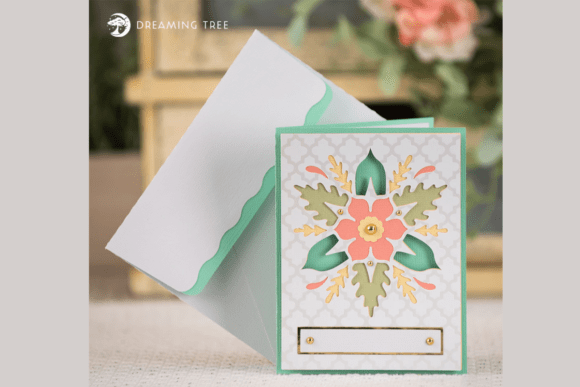
A single orchid bloom with blank sentiment tags, so the same net covers a birthday, a thank you and a get well card without recutting.
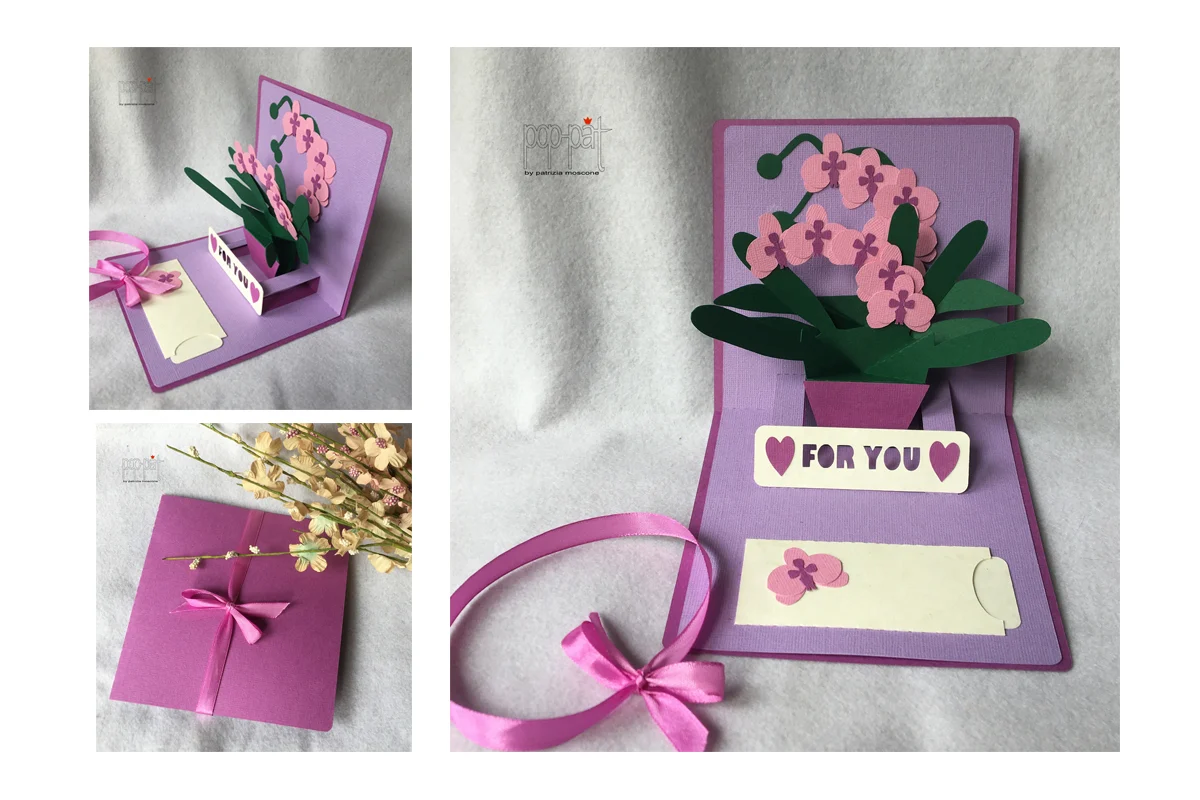
Pop Up Orchids
A square pop-up card with a stated finished size, which makes envelope matching a two-second job instead of a guess.
No cutting machine? Cut the walls by hand from a printed net. Keep your hand-cutting to the straight lines: it is the curves on the flowers that eat the evening.
Flower pop up card measurements and the envelope that fits
This is the table I wish somebody had handed me. Every row closes, and every row posts.
| Card base | Folded size | Paper square | Flower across | Envelope |
|---|---|---|---|---|
| A5, 148 x 210 mm | 148 x 105 mm | 10 x 10 cm | 12.4 cm | C6, 162 x 114 mm |
| A4, 210 x 297 mm | 210 x 148 mm | 14 x 14 cm | 17.4 cm | C5, 229 x 162 mm |
| 5 x 7 in | 5 x 3.5 in | 3 x 3 in | 3.7 in | A7, 5.25 x 7.25 in |
| Square, 13.5 cm | 13.5 x 6.75 cm | 8 x 8 cm | 9.9 cm | Square, 15 x 15 cm |
Two things to take from it. Your envelope wants about 7 mm of clearance each side, the minimum that lets a card with something inside it slide rather than scrape.
And the flower column is the square multiplied by 1.24, so you can add your own row for any base you like.
Posting one is the question nobody answers. I send mine flat, not padded: a padded envelope lets the card shift and the petals rub.
A plain envelope that fits snugly holds the flowers folded, which is how you want them to travel. The Orchid Box Card SVG states its finished size, so you can buy envelopes before you cut.
Heart pop up card: the same fold with one different cut

A heart pop up card is the folded-square flower with one change: at step three you draw a heart lobe instead of a petal curve.
Fold the square the same way, through the centre, three times. Then cut the open end as two shallow bumps meeting at a dip.
Open it and you have eight hearts radiating from a centre. Remove one, glue the gap, and it cones exactly like the flower.
Where it differs is colour. Eight identical red hearts look like a doily. I cut my seven squares in three tones, darkest on the crease, palest at the edges, and the card reads as depth.
For something that posts even thinner, use a flat cut flower panel instead of a cone. The Floral Card SVG folds flat for mailing and opens to layered blooms: the lowest-risk version of this whole project.
Pop up hug card: the flower that reaches out of the page
A pop up hug card is the one that gets saved and sent on. Two paper arms reach out and wrap around whoever is holding it, and the bloom sits where the hands meet.
It uses the same crease logic as the flower, with one addition. The arms are a single strip glued across the crease at the glue line, with a fold at each shoulder so they fold inward as the card shuts.
The flower goes on top of the strip, not on the card, so it travels with the arms.
Three numbers make it work. Your strip wants to be 240 mm long on an A5 card, so the arms clear the edges when open. Each shoulder fold sits 60 mm from the centre.
And the strip wants 160 gsm, heavier than your flower paper, or the arms droop within a day.
Keep the flower small here: a 7 cm square gives you a bloom about 8.7 cm across, which sits on the strip without hiding it. A tulip reads more clearly than a rosette at that size, and the Tulip Greeting Card SVG gives you it layered.
Pop up valentine cards diy from the same two mechanisms
Nothing new to learn, which is the point. With both mechanisms in your hands, every occasion is a change of colour and sentiment, not of build.
- Valentine’s: the heart cone, three tones of red, one line of handwriting under it. Keep the inside almost empty so the hearts are the only thing happening.
- Mother’s Day: seven flowers in one colour family, paler at the edges, stems drawn on the card instead of cut, which reads as a bouquet in a photograph.
- Anniversary: a box card with a layered bouquet, because depth is what makes a card look bought.
- Birthday: mixed colours, one flower bigger than the rest on the crease, the greeting written on the biggest petal.
- Get well: flat layered blooms, not cones. They post better and survive being propped on a shelf.
One rule carries across all of them: decide the occasion before you cut, because colour is the decision you cannot change later.
For a set you will repeat, the Paper Flower Template Bundle covers several flower shapes and planters in one file, so your occasions stop being separate projects.
When folding by hand stops being enough: flower pop up card templates
Scissors are enough for the folded-square flower. One card, one evening, no file needed. I would not buy anything to make that card.
Where hand-folding stops is specific, and worth naming so you only spend when it helps.
- Quantity. Thirty cards for a class or a wedding. Seven cones a card is 210 cones, and the fourteenth stops being fun.
- Box cards. Corner tabs at the wrong angle jam the box, and the angle changes with the wall height. Geometry, not neatness.
- Layered blooms. Three stacked petal layers per flower, registered to each other, is not a scissors job.
- An unusual base size. A square card, an oversized card, a card that has to match an envelope you own.
- Selling them. Free templates are licensed for personal use. Making cards to order needs a file that says you may.
That last point catches people out. The free flower pop up card template you download is usually one card at one fixed size, often behind an email signup, and never with a commercial licence.
It is fine for the card you are making tonight and useless for the thirty you promised. These are the files that cover the gaps above.

Paper Flower Template Bundle
Six flower designs and six planters, sized from 2 to 3 inches tall. The way out of cutting the same rosette two hundred times.

Pop-up Sunflower Greeting Card Template
A 5 x 7 in pop-up card with the matching envelope in the same file, in PDF as well as cut formats, so it works with or without a machine.

Floral Card SVG
Layered blooms and leaves on a card that folds flat for mailing. The registration between layers is the part you cannot do with scissors.
All three want a cutting machine for the layered pieces. No machine: pick the file with a printable PDF, hand-cut it, keep box cards for later.
Before you glue your flower pop up card, confirm:
- Your paper square multiplied by 1.24 is smaller than the closed card minus 10 mm.
- The flowers are 80 to 120 gsm and the base is 200 to 250 gsm.
- Your base crease was scored before it was folded.
- A pencil line sits 13 mm out from the crease on both pages, and every flower is glued inside it.
- Each cone is flattened along one line, not crumpled.
- No flower is glued to another flower, and none comes within 5 mm of the card edge.
- The card closes and opens three times without a petal catching.
- You have an envelope with about 7 mm clearance on each side.
Pop Up Cards for a Birthday: Which Fold to Choose

Pop up cards for a birthday do best with the folded-square flower or the box card bouquet, because both open into a clear focal point. Match the paper weight to the part: a lighter sheet for the petals, a sturdier one for the base card so it still closes flat. Write the message on the inside back panel, away from the glued parts, and test the fold once before you glue anything.
Christmas Pop Up Cards from the Same Folds
Christmas pop up cards use the same mechanisms as the flower card, with a different focal piece. Swap the flower for a tree, a star or a wreath cut from the same paper weight, and keep the glue points where the flower attached. Check that the card still closes after you add glitter or foil, since extra layers add thickness and can stop the fold from lying flat in the envelope.
Flower pop up card FAQ: paper, size, glue, mailing, how long it takes
How to make a flower pop up card easy, with no template?
Cut seven 10 cm squares, fold each through the centre three times, cut one petal curve, open, remove one petal and glue the gap. Glue the flattened cones 13 mm out from the crease. Scissors and a glue stick, nothing else.
How do you make a pop up flower card so it stays shut?
Two numbers. Keep your paper square at or under 11 cm on an A5 base, and keep every glue line 13 mm from the crease. A card that will not stay shut has failed one of those.
How to make flower pop out card petals that do not crease wrongly?
Flatten each cone along a single line before gluing, and glue the two halves at the same distance from the crease. A flower glued crooked twists as the card closes, and that twist creases the petals.
How to make a 3d flower pop up card with real depth?
Use the box card mechanism, not one cone. Four hinged walls give you a front, middle and back plane, so your bouquet has depth. The net has to be accurate, which is what a cut file is for.
How to make a bouquet flower pop up card step by step?
Build the box base first and test that it folds flat. Then mount the bouquet in three layers, back layer first, each glued only along its bottom edge so it hinges. The flowers go in last. The Flower Bouquet 3D Pop Up Card ships those layers already registered.
What paper is best for a paper flower pop up card?
80 to 120 gsm for the flowers, which includes ordinary printer paper, and 200 to 250 gsm cardstock for the base. Avoid anything coated or glittered for the flowers: the coating stops the cone collapsing.
How to make a flower pop up card for mother’s day in an evening?
Seven flowers in one colour family, paler towards the edges, stems drawn straight on the card with a fine-tip marker. About forty minutes, and the markers are most of it.
Is there a free flower pop up card template, and is it enough?
There are plenty, usually one card at one fixed size and usually behind an email signup. Fine for one card. Not enough for an unusual size, layered blooms, a box card, or anything you intend to sell, because free files are licensed for personal use. A paid file such as the Pop-up Sunflower Greeting Card Template covers those cases.
How do I post a flower pop up card without damaging it?
A plain envelope with about 7 mm clearance on each side, not a padded one. A snug envelope keeps your flowers folded while they travel; a padded one lets the card slide and the petals rub.
Where to buy flowers pop up cards online instead of making one?
They are sold everywhere, in fixed designs at fixed sizes. You make one so that you choose the colours, the size and the words, which is the only reason anyone keeps a card.
Key takeaways
- A flower pop up card is a flattened paper cone glued across the crease, so the card itself drives the flower.
- Multiply your paper square by 1.24 for the finished flower width. On an A5 base, 10 cm squares fit and 15 cm squares do not.
- Glue every flower 13 mm in from the inner crease, on both pages, at the same distance.
- Flowers want 80 to 120 gsm, your base wants 200 to 250 gsm. One weight for both is why cards bow.
- The box card is the second mechanism and the only one that gives a bouquet real depth. It needs an accurate net.
- A folded A5 card is 148 x 105 mm and posts in a C6 envelope with 7 mm to spare. Send it flat.
- Scissors are enough for one card. For quantity, box cards, layered blooms or odd sizes, a file such as the Paper Flower Template Bundle pays for itself on the second card.
More paper projects next: eight pop up card ideas and the mechanism behind each one, an explosion box with the measurements chart, junk journal ideas, a printable to-do list template and the free 2027 calendar printables. There is more about me and this site if you need it.