You bought the cover, or only looked at it, and now the blank inserts feel too good to touch. Below are 15 DIY travelers notebook ideas you can make from paper you already own (or a few printable sticker sheets), each with the detail that stops a page going wrong.
Pick one in a minute from the table and start tonight.
I list the paper, the tools and the one detail that decides whether the page works, so you can see before you start what the evening will cost in effort and what you will have in your hands at the end of it.
I make mine slowly, one insert at a time.
I have ruined plenty of pages by rushing, and I now test every idea on scrap first.
The ones that survive a whole trip are always the simplest.
Each idea says who it suits and who should skip it, so you do not waste an evening on the wrong one.
Quick answer
Start with idea 1 (a kraft paper cover with a rubber band) if you have never made one, or idea 2 (a passport-size insert) if you already own a cover. Both take under half an hour.
What is a DIY travelers notebook?
A DIY travelers notebook is a refillable notebook you make yourself: a cover, such as kraft cardstock with a rubber band, that holds two to four thin inserts. It differs from a bound journal because you can swap, add or remove inserts whenever you like. The two common sizes are standard, about 4.3 by 8 inches, and passport, about 3.5 by 5 inches. It suits anyone who wants to plan, log and keep a trip on paper.
Pick your idea in a minute
| Idea | Best for | Style / Pages / Skill | Avoid if |
|---|---|---|---|
| 1. Kraft paper cover with a rubber band | Beginners, one evening | Rustic / 1 cover / Easy | Your trip is wet |
| 2. Passport-size insert for a pocket | Carry-everywhere notes | Minimal / 12-16 pages / Easy | You write long entries |
| 3. Monthly trip planner insert | Planning before you leave | Clean / 8 pages / Easy | You prefer to improvise everything |
| 4. Ticket and receipt pocket page | Collecting paper from the trip | Junk journal / 2 pages / Easy | You throw tickets away at once |
| 5. Hand-drawn map spread | Remembering a route | Sketch / 2 pages / Medium | You say you cannot draw |
| 6. Day-by-day travel log | Trips longer than a weekend | Journal / 1 page a day / Easy | You get tired in the evening |
| 7. Photo pocket with polaroid prints | Instant memories | Scrapbook / 2 pages / Easy | You do not print photos |
| 8. Washi tape divider tabs | Finding a section fast | Colourful / 3-5 tabs / Easy | You want a plain look |
| 9. Packing list checklist insert | Before every flight | Practical / 2 pages / Easy | You pack at the last minute |
| 10. Pressed flower and leaf page | Nature walks | Botanical / 1 page / Medium | You travel with only hand luggage |
| 11. Vintage ephemera collage page | Soft nostalgic look | Junk journal / 2 pages / Medium | You like clean white pages |
| 12. Budget tracker page | Keeping spending honest | Practical / 1 page / Easy | You dislike numbers |
| 13. Language phrase cheat sheet | Trips abroad | Study / 1 page / Easy | You rely only on a translation app |
| 14. Fold-out panorama spread | The one trip you love | Scrapbook / 1 long page / Hard | You want it finished quickly |
| 15. Souvenir sticker and stamp page | Closing the notebook | Playful / 1 page / Easy | You try to keep the notebook flat |
How to choose
Three checks decide whether a DIY notebook feels good or frustrating, and each is where a free sheet loses to a proper kit.
- Layers and density of a spread: count how many layers a page carries before you glue. Free single sheets rarely come with matching backgrounds, so pages drift apart in colour.
- Sharpness when printed: print one test page at actual size and look at the text edge. Low-resolution freebies blur at small insert sizes.
- Enough for the whole notebook: add up the pages you need. A scattering of free sheets runs out halfway, and then the last third looks different.
1. Kraft paper cover with a rubber band
Fold a sheet of kraft cardstock around two or three thin inserts and hold the spine with a rubber band.
It costs almost nothing, so you stop being afraid of ruining it.
I test the fold on scrap paper first: cardstock cracks if you fold it against the grain.
- Best for: Beginners, one evening
- Avoid if: You want it to survive a rainy trip
You’ll need for idea 1
- Kraft cardstock
- a rubber band
- a bone folder or the back of a spoon
2. Passport-size insert for a pocket

Cut A4 paper into three strips of about 3.5 by 5 inches and staple them in the fold.
A passport size fits a jacket pocket, so you actually write on the road.
I check my cover width before you cut, because a few millimetres decide whether the insert slides in.
- Best for: Carry-everywhere notes
- Avoid if: You write long entries
You’ll need for idea 2
- A4 paper
- a ruler
- a long-reach stapler or needle and thread
3. Monthly trip planner insert
Draw one grid per day with three lines: where, what to book, what to carry.
One glance tells you what is booked and what is still empty.
Leave the last page blank for the surprises that always arrive, or fill it later with a few mini doodles of what you saw.
- Best for: Planning before you leave
- Avoid if: You prefer to improvise everything
You’ll need for idea 3
- Printed grid
- a fine pen
- washi tape for tabs
4. Ticket and receipt pocket page
Fold a sheet into a pocket, add a paper collage corner, glue the sides only, and slide in boarding passes, museum stubs and receipts.
A pocket keeps bulky scraps flat and lets you decide later what is worth gluing.
Glue the sides and bottom, never the top, or the pocket becomes a wall.
- Best for: Collecting paper from the trip
- Avoid if: You throw tickets away at once
You’ll need for idea 4
- Light cardstock
- a glue stick
- a pencil
5. Hand-drawn map spread
Trace the outline of a city or country from a printed map and mark only the stops you made.
A rough map is more personal than a perfect one, and you only need the shape.
I draw in pencil first, ink last, and keep the labels small so the route stays readable.
- Best for: Remembering a route
- Avoid if: You say you cannot draw
You’ll need for idea 5
- Printed map
- tracing paper
- a fineliner
6. Day-by-day travel log
Use a fixed layout: weather, one highlight, one meal, one small cost-free memory.
A fixed layout turns a blank page into a five-minute habit.
Write the date and place first, in neat hand lettering if you like; you forget both faster than you expect.
- Best for: Trips longer than a weekend
- Avoid if: You get tired in the evening
You’ll need for idea 6
- Lined or dotted paper
- a pen
- a small date stamp
7. Photo pocket with polaroid prints
Print photos at about 2 by 3 inches and tuck them into a pocket with a pull-out tab.
Tucked-in photos can be swapped later, so you are not committing on day one.
Use photo corners or removable tape if you plan to reorganise.
- Best for: Instant memories
- Avoid if: You do not print photos
You’ll need for idea 7
- Photo paper
- photo corners
- a paper trimmer
8. Washi tape divider tabs
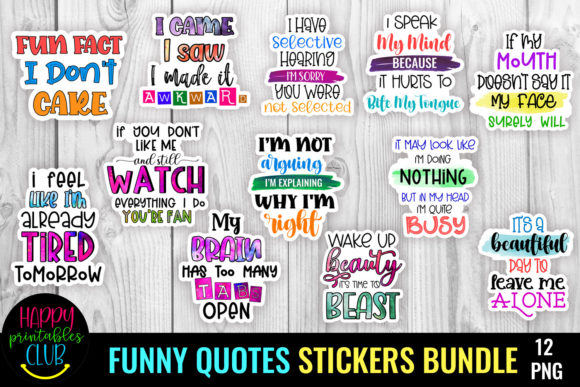
Fold a strip of washi tape over the page edge to make a tab, one colour per section.
Colour coding means flipping straight to the bookings, the map or the diary.
Keep to three colours so the tabs read as a system, not decoration.
- Best for: Finding a section fast
- Avoid if: You want a plain look
You’ll need for idea 8
- Washi tape
- scissors
9. Packing list checklist insert
Print a checklist, laminate it with clear tape, and tick items off with a dry-erase marker.
The same list works every trip and removes the late-night doubt.
Group items by place (bag, pocket, charger pouch) and not by type.
- Best for: Before every flight
- Avoid if: You pack at the last minute
You’ll need for idea 9
- Printed checklist
- clear tape or a laminating pouch
- a dry-erase pen
10. Pressed flower and leaf page
Press a flat leaf or petal (see pressed flower art) inside the notebook, then secure it with tape strips.
A real leaf from the place beats any sticker you could buy.
Dry it for several days first; a fresh leaf leaves a stain on the paper.
- Best for: Nature walks
- Avoid if: You travel with only hand luggage
You’ll need for idea 10
- Leaves or petals
- tissue paper
- tape strips
11. Vintage ephemera collage page
Layer a tea-stained base (the same trick as in our junk journal ideas), a torn map piece and one stamp-style label, then stop.
Three layers look rich; ten look messy.
Choose one dominant colour so the page reads at a glance.
- Best for: Soft nostalgic look
- Avoid if: You like clean white pages
You’ll need for idea 11
- Old book page
- map scrap
- glue
- a stamp pad
12. Budget tracker page
Draw five columns: date, place, category, amount, note, and total each evening.
Writing the amount down daily stops the surprise at the end of the trip.
Use your local currency on the road and convert once at home.
- Best for: Keeping spending honest
- Avoid if: You dislike numbers
You’ll need for idea 12
- Ruler
- pen
- a pencil for totals
13. Language phrase cheat sheet
Write ten phrases you will really say: hello, thank you, how much, where is, no meat.
A written phrase works with no signal and no battery.
Spell the pronunciation the way you hear it, not the official way.
- Best for: Trips abroad
- Avoid if: You rely only on a translation app
You’ll need for idea 13
- Index card or paper strip
- a bold pen
14. Fold-out panorama spread
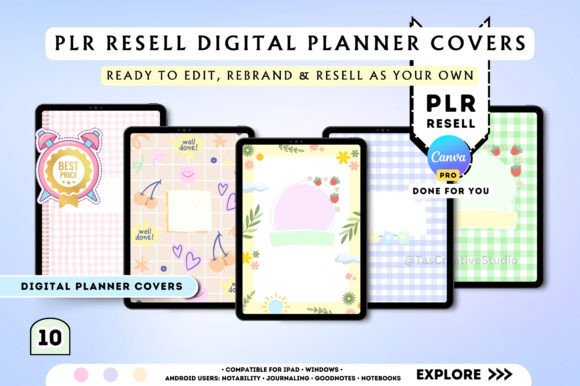
Glue three panels, as in these scrapbook layouts, into a concertina and fill it with photos and a hand-written route.
It opens to a full view of the trip, like a tiny exhibition.
Fold along a ruler and burnish every crease or the panels will sag.
- Best for: The one trip you love
- Avoid if: You want it finished quickly
You’ll need for idea 14
- Cardstock strips
- glue
- a bone folder
- photos
15. Souvenir sticker and stamp page
Collect stamps from the places you visit and add one small sticker for each stop.
A stamp page becomes the cover of the story when you flip through at home.
Let ink dry before closing the notebook or it will transfer to the facing page.
- Best for: Closing the notebook
- Avoid if: You try to keep the notebook flat
You’ll need for idea 15
- Ink pad
- a small stamp
- printed stickers
If it goes wrong
- The inserts do not fit the cover: measure the cover first and cut the paper to that width, not the other way round.
- Glue wrinkles the page: switch to a glue stick or double-sided tape and press the page under a heavy book.
- The pen bleeds through: test every pen on a scrap first and keep wet inks for the thicker pages.
- The notebook stays blank: do one small page tonight, the packing list or the ticket pocket, and let the rest follow.
When the free version isn’t enough
When you want matching pages for the whole notebook, a single set of coordinated papers beats a pile of loose sheets.
Our junk journal ideas show kits that carry one palette from the first page to the last, and the scrapbook design ideas guide explains how to keep that palette to three colours.

Key takeaways
- Measure your cover before you cut any paper.
- Start with a kraft cover or a passport insert, both take under half an hour.
- Test pens and glue on a scrap page first.
- Keep the last page free for souvenirs you collect on the road.
- Use three colours at most so the pages match.
Common questions
What size should a DIY travelers notebook be?
A DIY travelers notebook is usually made in one of two sizes: standard, about 4.3 by 8 inches, or passport, about 3.5 by 5 inches.
Slim passport inserts ride in a jacket pocket. A standard size gives more room for long entries, maps and photo pockets.
What paper works best for inserts in a DIY travelers notebook?
Medium-weight paper works best for DIY travelers notebook inserts, because it takes pen and light glue without wrinkling.
Heavier cardstock suits covers and dividers better than pages. Test every pen on a scrap first, since wet inks can bleed through thinner sheets, and keep glue to a thin layer.
How many inserts fit in one DIY travelers notebook cover?
Most DIY travelers notebook covers hold two to four thin inserts, held in place by elastic cords.
Thicker inserts put strain on the spine. Cut every insert a hair narrower than the cover, so it slides in without forcing.
Can I make a DIY travelers notebook cover without sewing?
Yes, you can make a DIY travelers notebook cover without sewing.
Wrap one folded kraft cardstock sheet around a few slim inserts and tie it shut with a rubber band.
It needs no needle and takes under half an hour, so it is the fastest way to test the idea.
How do I keep pages from wrinkling in a DIY travelers notebook?
Use a glue stick or double-sided tape instead of wet glue to keep DIY travelers notebook pages from wrinkling.
Work on a flat table and weigh the page down with a book for a few minutes. Glue the sides and bottom of pockets, never the top.
Is a DIY travelers notebook a good gift?
Yes, a DIY travelers notebook makes a good gift, as long as you finish one page properly.
A single complete spread shows the idea better than ten half-filled ones. The packing list or the ticket pocket page is a quick one to finish first.